
Text Message
What it does. Sends a plain text reply — no buttons, no image. The simplest way to say something. When to use it. Greetings, confirmations, opening hours, an address, a thank-you at the end of a flow. How to set it up. Click the card and type your message in the Message Text box. Type @ anywhere to insert a merge field. The Message Text field is required. It supports up to 4,096 characters on WhatsApp and 2,000 characters on Messenger. A character counter below the field shows how many characters you’ve used.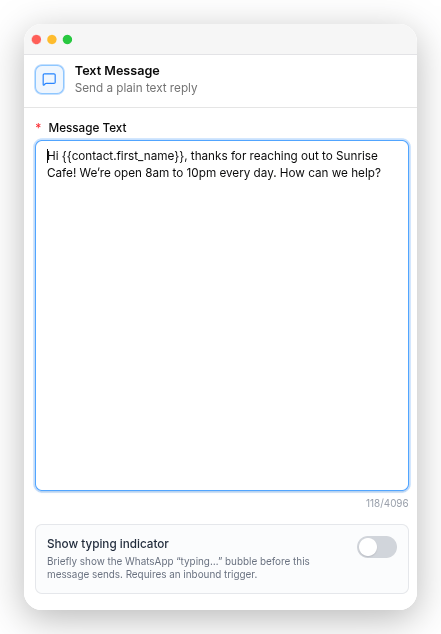
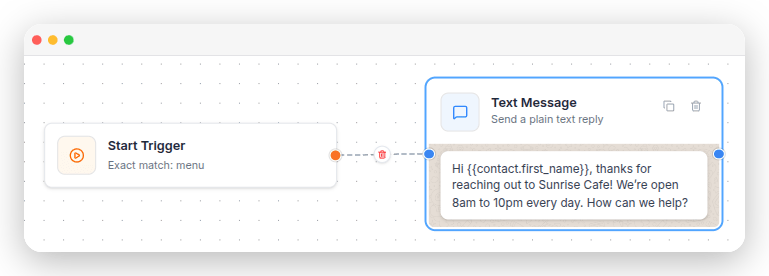
Hi , thanks for reaching out to Sunrise Cafe! We’re open 8am to 10pm every day. How can we help?
Button Message
What it does. Sends a message with up to three clickable buttons. The customer chooses an option by clicking a button, and the chatbot continues with the next flow step for that option. When to use it. Use button messages when you want customers to choose from a list of options instead of typing a reply. They’re ideal for main menus, yes/no questions, or letting customers select a service. How to set it up.- Type the message in the Message box.
- Under Buttons, add each button and fill in its Button Text — for example,
Yes, continue. - Value (payload) is optional; leave it blank and it defaults to the button text.
- Back in the Flow Builder, each button has its own connection point on the right. You must connect each button to the flow step you want the chatbot to run when that button is selected.
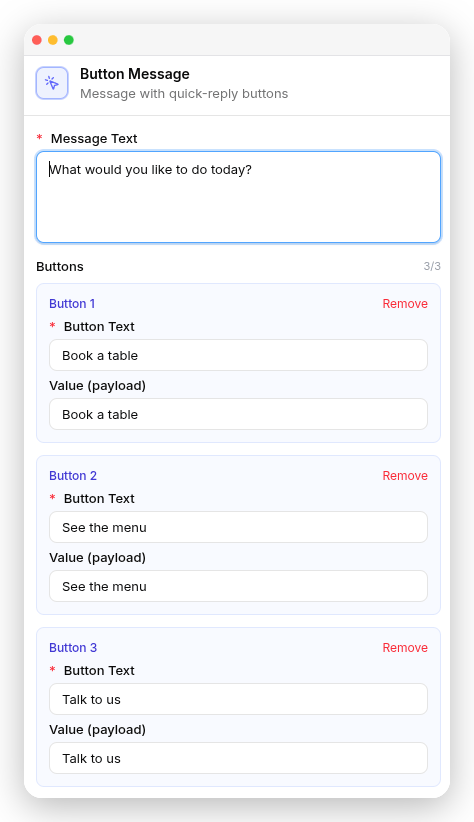
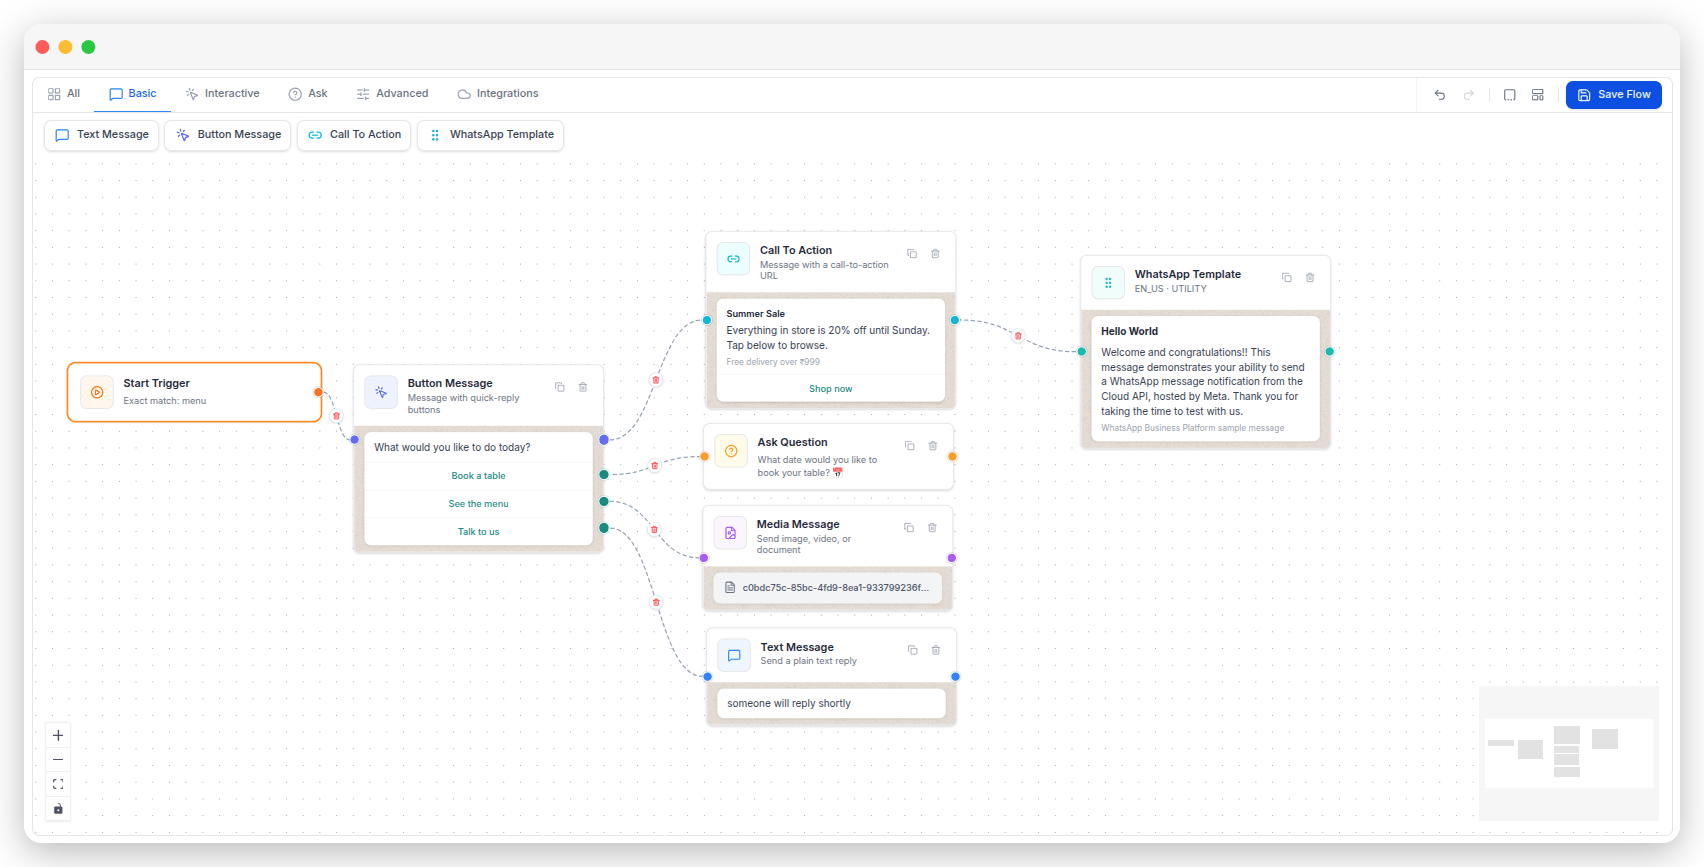
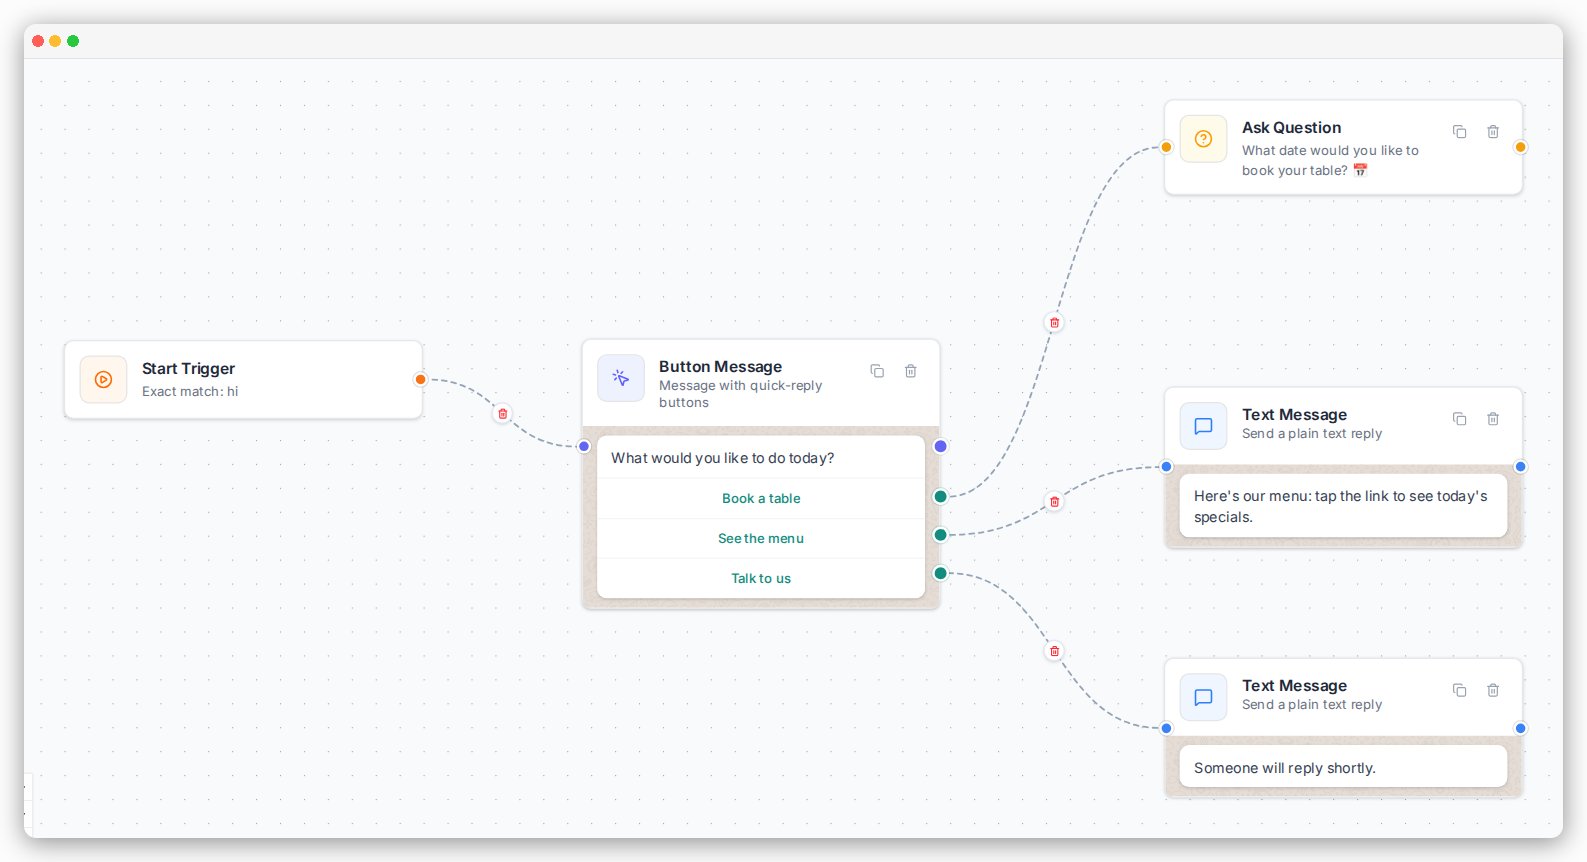
Message: What would you like to do today? Buttons:ConnectBook a table·See the menu·Talk to us
Book a table to an Ask Question asking for the date, See the menu to a Media Message with your PDF menu, and Talk to us to a Text Message saying someone will reply shortly.
Call To Action
What it does. Sends a message with a button that opens a website or web page. When the customer clicks the button, they’re taken directly to the link you’ve provided. When to use it. Sending someone to a product page, a payment link, a booking page, or a form. How to set it up. Enter the Body Text, the Button Text (for example,Learn More), and the Button Link you want the button to open. You can also add an optional Header and Footer.
The Body Text, Button Text, and Button Link fields are all required. The Body Text supports up to 1,024 characters, Button Text up to 20 characters, and the optional Header and Footer up to 60 characters each.
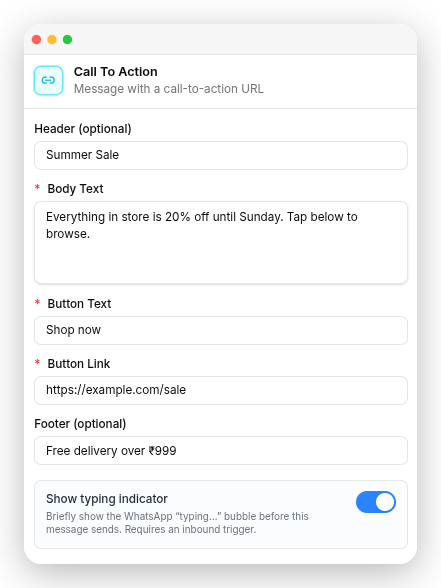
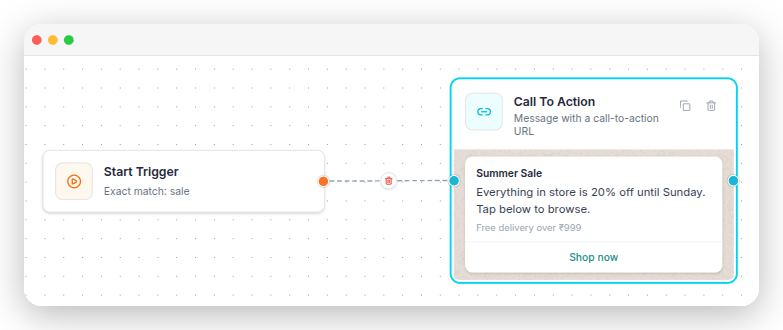
Header: Summer Sale
Body Text: Everything in store is 20% off until Sunday. Tap below to browse.
Button Text: Shop now
Button Link: https://example.com/sale
Footer: Free delivery over ₹999
WhatsApp Template
What it does. Sends one of your approved WhatsApp templates. When to use it. Use this step to send a ready-made, approved message from your flow — such as an order confirmation or a delivery update. How to set it up. Click the step and select your template. If it has variables, fill in each Body variable field — type @ to insert a merge field like the contact’s name. If the template has a media header, upload the image, video, or document here too. You must select a template before the flow can be saved. Length limits come from the template itself, which Meta has already approved.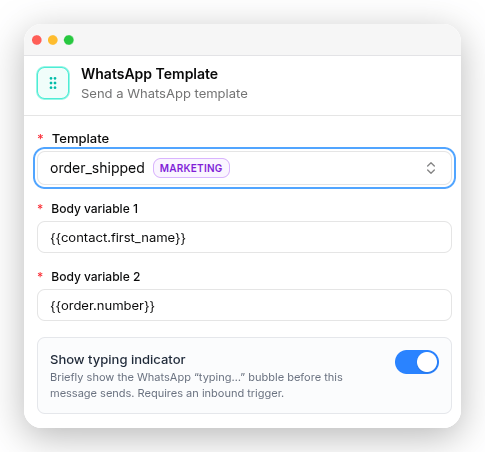
order_shipped template:
Hi , your order has shipped and should arrive in 2–3 days.Map
{'{{1}}'} to the contact’s first name and {'{{2}}'} to the order number.
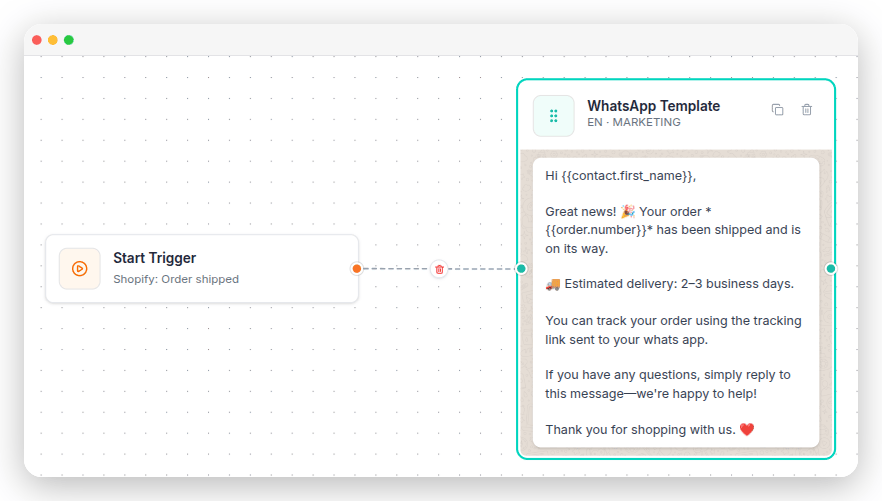
You need at least one approved template first. See WhatsApp Templates. This step is hidden on Messenger flows.
WhatsApp Flow
What it does. Sends one of your WhatsApp Forms as part of the conversation — the customer clicks a button to open the form right inside WhatsApp. In the builder, this step is called WhatsApp Flow. When to use it. Use this to collect structured answers from within an automated conversation — for example, a return request or a delivery address, after a Button Message option like “Return an item.” How to set it up. Select the WhatsApp Flow to send. You can also add optional Body Text and change the Button Text shown on the message (defaults to “Open”). Only Published flows on the same WhatsApp account as this automation appear in the dropdown. Selecting a flow is required — the flow can’t be saved without one.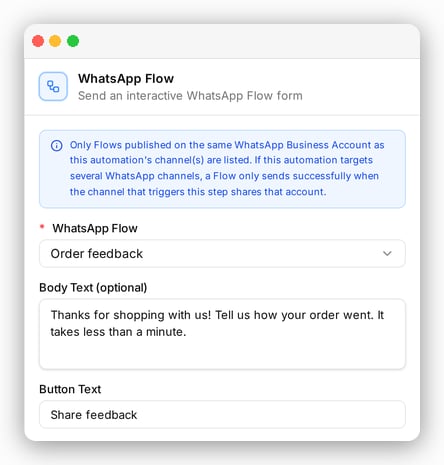
This step needs an open 24-hour conversation window with the customer, and isn’t supported on Messenger flows.
Messenger Template
What it does. Sends one of your Messenger templates. When to use it. Use this step to send a ready-made template from a Messenger flow — such as a welcome message or a quick reply menu. How to set it up. Select your Messenger template. If it has variables, fill in each Body variable field — type @ to insert a merge field like the contact’s name. A Preview below shows how the message will look, including any buttons. You must select a template before the flow can be saved.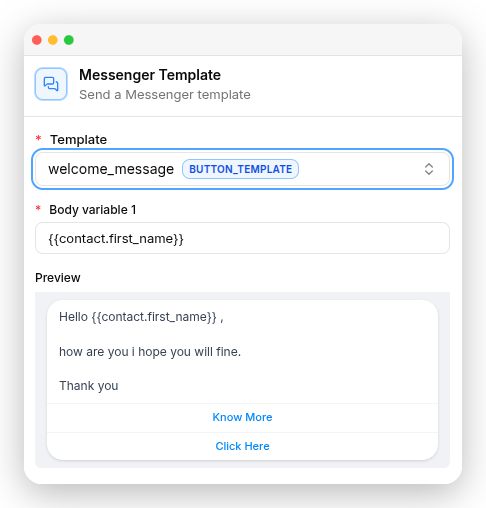
hi or hello starts with a welcome_message template:
Hi , welcome to our store! How can we help you today?Map
{'{{1}}'} to the contact’s first name. The template’s Know More and Click Here buttons are shown in the preview.
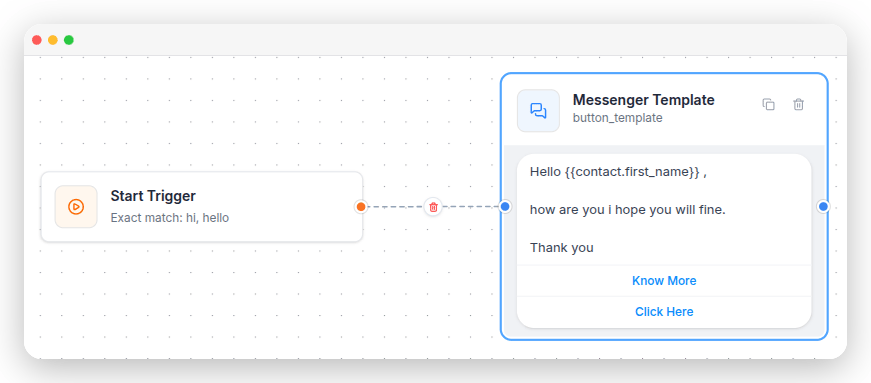
This step only appears on Messenger flows and is hidden on WhatsApp flows. See Messenger Templates.
Show Typing Indicator
Turn this on to show a “typing…” bubble for a moment before your message arrives, so the chat feels more natural. It’s available on every step in this category except Messenger Template.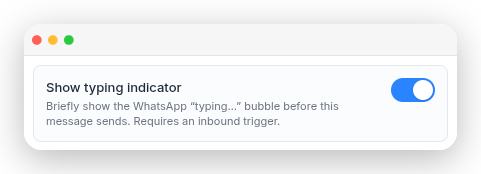
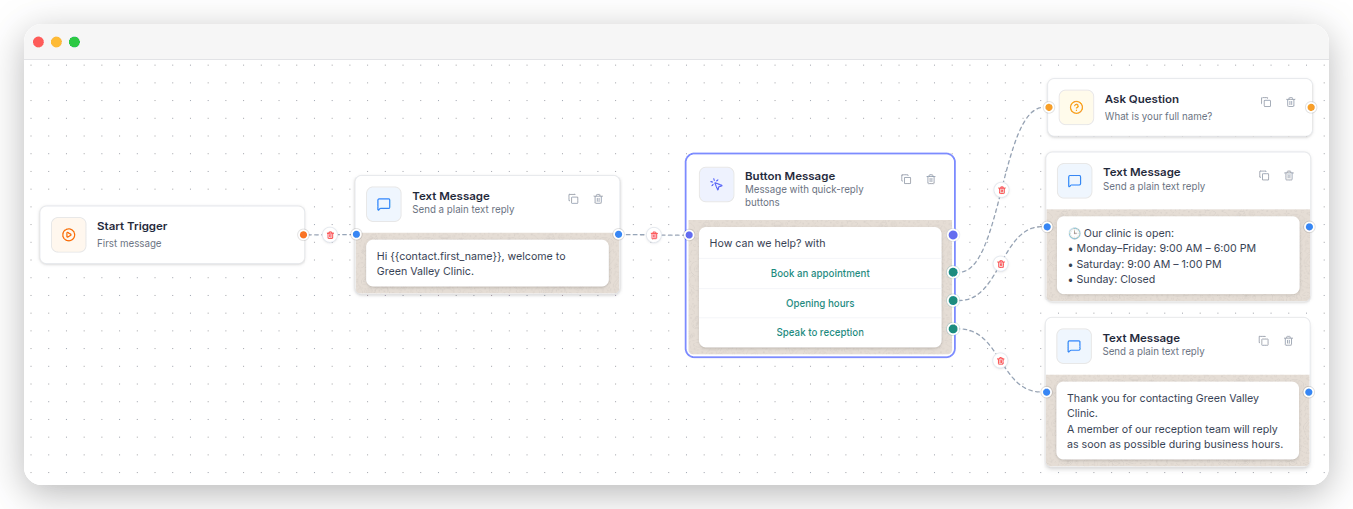
A worked example
A small clinic wants a flow that greets new patients and routes them:- Start Trigger — First message from lead/customer.
- Text Message — “Hi , welcome to Green Valley Clinic.”
- Button Message — “How can we help?” with
Book an appointment,Opening hours,Speak to reception. - From
Opening hours, a Text Message with the timings. - From
Speak to reception, a Text Message saying a team member will reply. - From
Book an appointment, continue into the Ask steps to collect the details.
What’s next
Interactive
Menus, images, videos, map pins, and contact cards.
Ask
Collect answers and save them against the contact.