

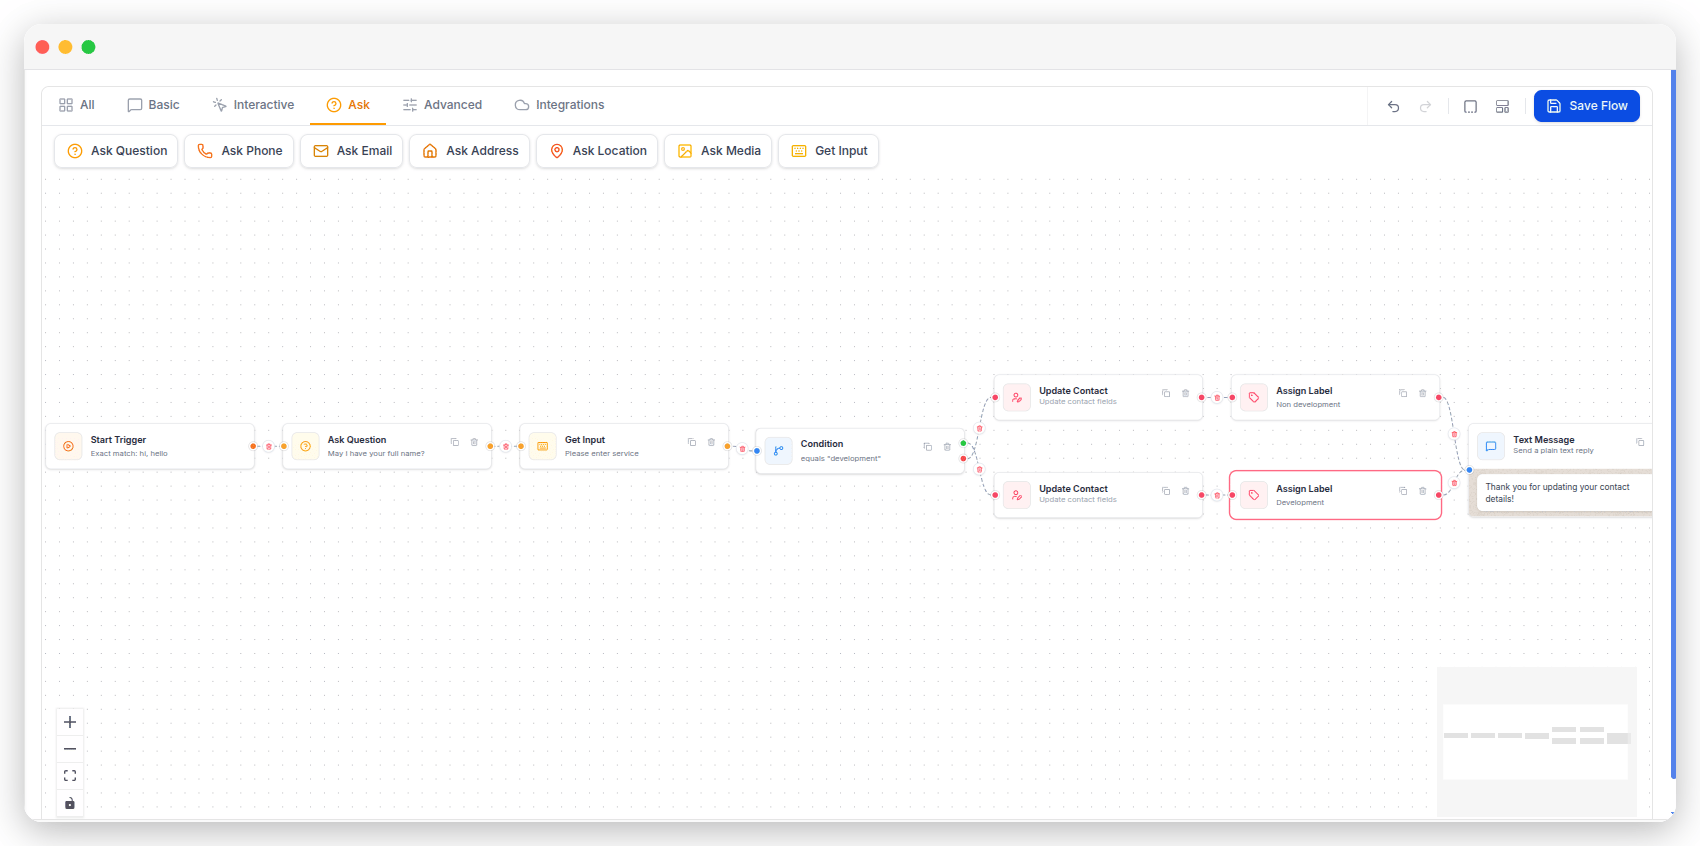
Waiting
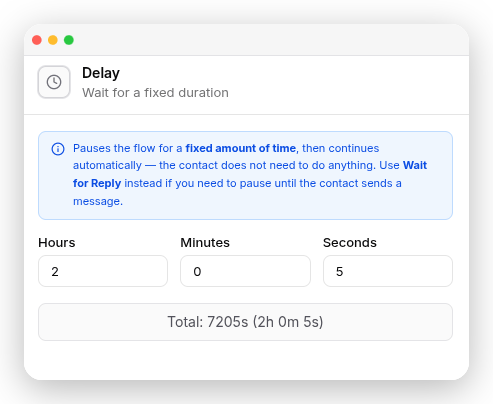
Delay
What it does. Pauses the flow for a specified time before moving to the next step. When to use it. Use it whenever you want to wait before the next step. For example, send a follow-up after a day or remind customers about an abandoned cart after an hour.- Hours, Minutes and Seconds all start at 0; set at least one of them to make the step wait.

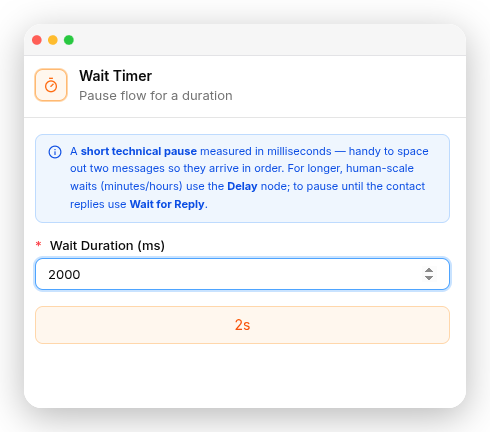
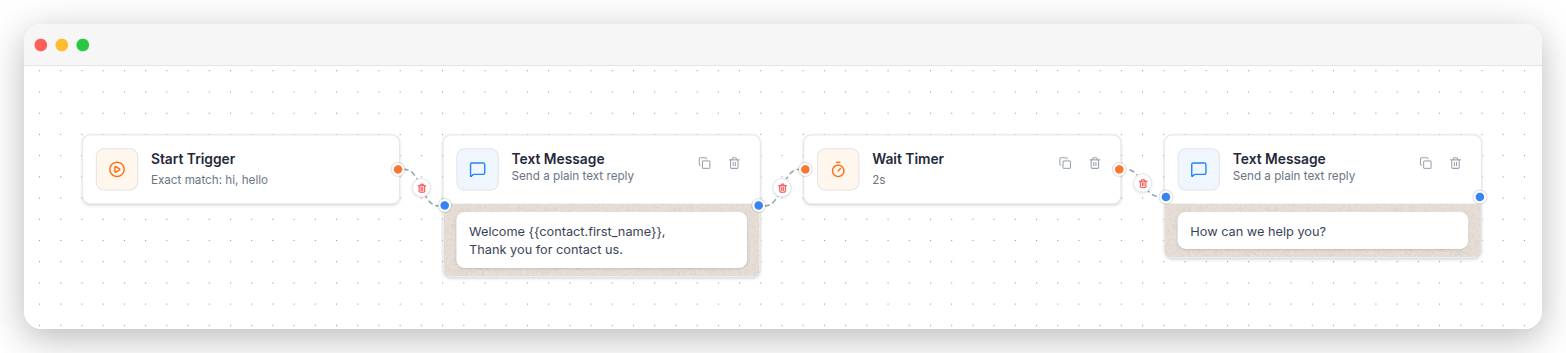
Wait Timer
What it does. Adds a very short delay before the flow continues. The delay is set in milliseconds, and the equivalent time in seconds is shown as you type. When to use it. Use it when you need a very short pause between steps, such as making sure two messages are sent in the correct order. For longer delays, use Delay instead. Required fields- Wait Duration (ms) is required, and must be at least 1.
Wait for Reply
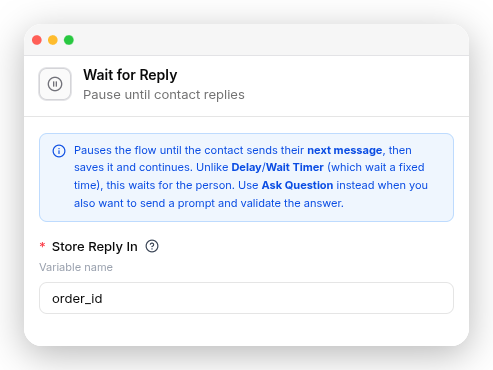
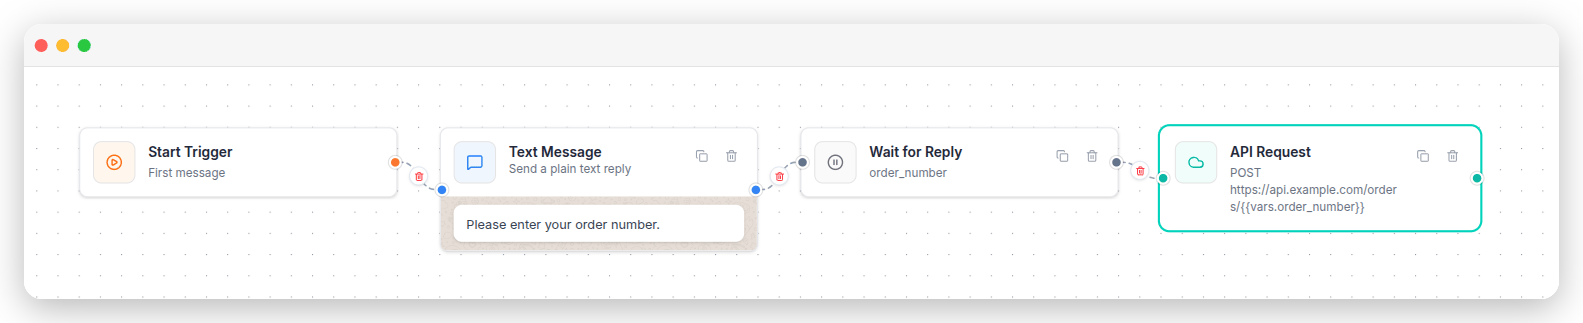
What it does. Waits for the customer’s next message, saves it, and then continues the flow. Unlike Delay, it waits for a customer reply instead of a set amount of time. When to use it. Use it when you want to save the customer’s next reply without asking a question. If you want to ask a question and validate the answer, use Ask Question instead. Required fields- Store Reply In is required. Use lowercase letters, numbers, and underscores, starting with a letter — for example
user_provided_id.
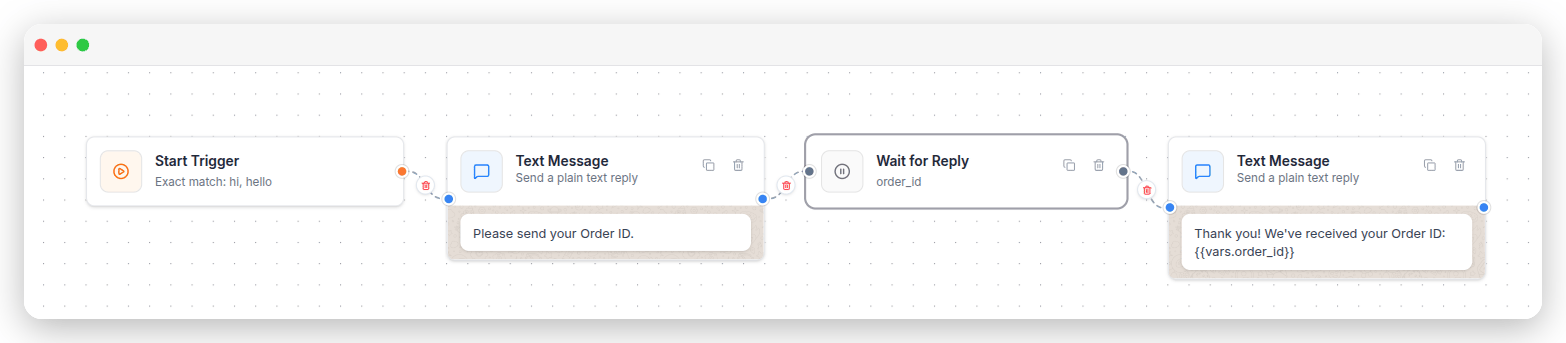
order_id, then a Text Message confirming it back with .
Branching
Condition
What it does. Checks one value and splits the flow into two paths — YES if the condition is met, or NO if it isn’t. When to use it. Use it when there are only two possible outcomes. For example, check whether the customer replied yes, or whether they are a returning customer. How to set it up. Choose the Operator — Contains, Equals, Starts with, Ends with or Regex — then type the Value you want to check against. On the step itself, the green dot on the right is the YES path, and the red dot below it is the NO path. Connect each dot to the step that should run next. Required fields- Operator and Value are both required. Operator defaults to Contains.
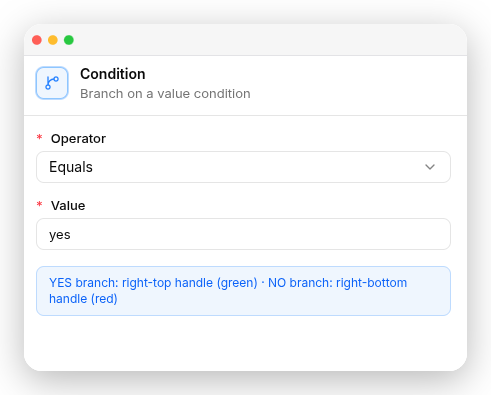
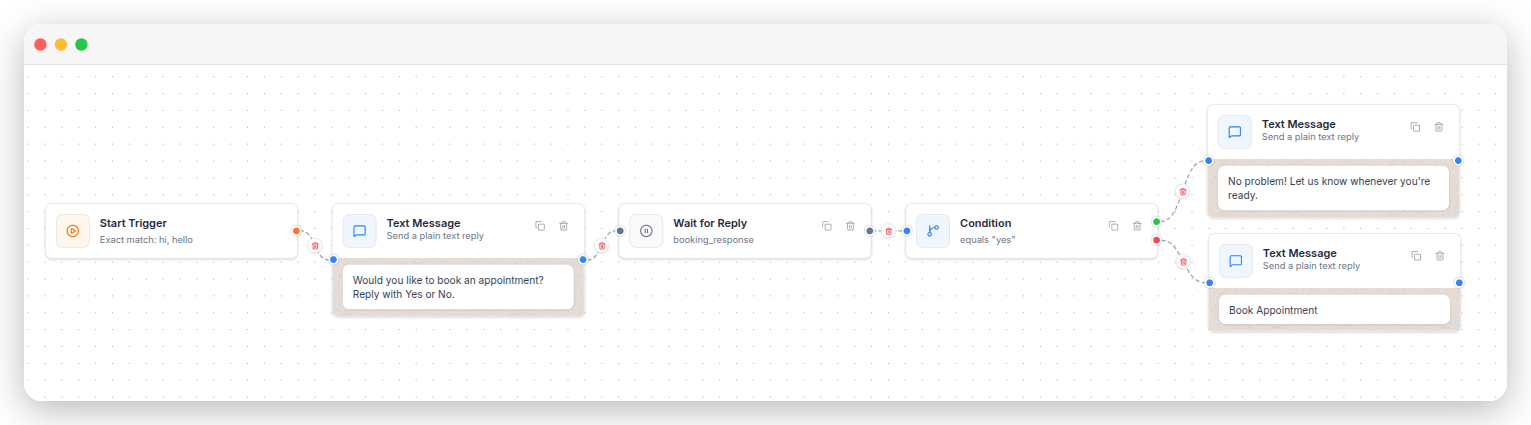
Operator: Contains Value: yesConnect the green YES dot to the booking steps, and the red NO dot to a polite “No problem, we’re here whenever you need us.”
Logic Control
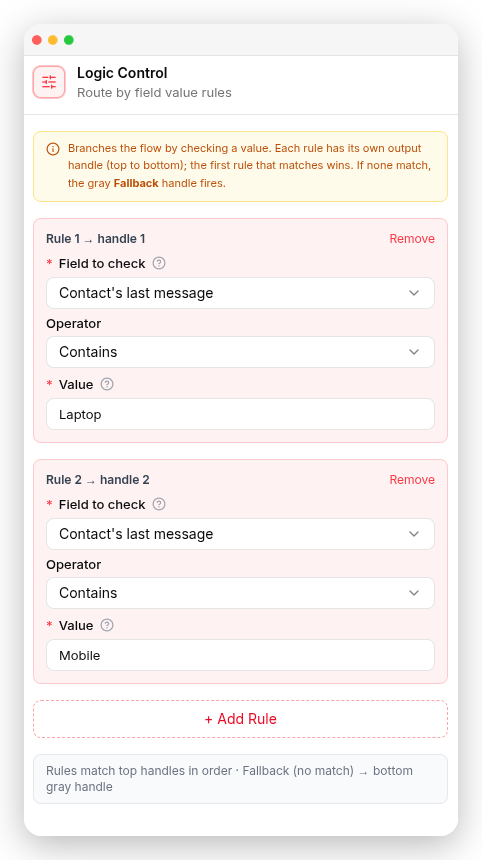
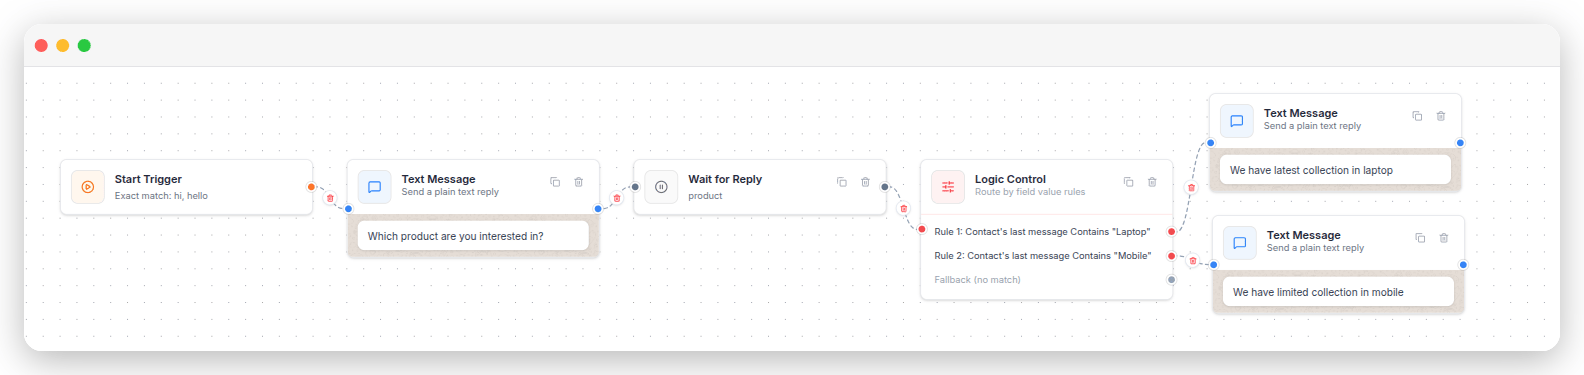
What it does. Checks a value against a set of rules and sends the flow down a different path for each one. It works like Condition, but it isn’t limited to two paths. When to use it. Use it when a value can lead to more than two outcomes, such as sending a different reply for each order status. How to set it up. First pick what to check: the last message, a flow variable you saved earlier, a contact custom field, or an API response value. Then add a rule for each outcome you want, and connect each one to the step that should run next. The operators are Contains, Equals, Starts with, Ends with, Regex, Is empty and Is not empty, plus >, <, ≥ and ≤ for comparing numbers. Required fields- You need at least one rule.
- Every rule needs a field to check.
- Every rule needs a value, except when the operator is Is empty or Is not empty.
party_size:
- ≤ 4 → send the standard table confirmation.
- > 4 → send “For larger groups we’ll call you to confirm” and tag the contact for follow-up.
Updating the contact
Update Contact
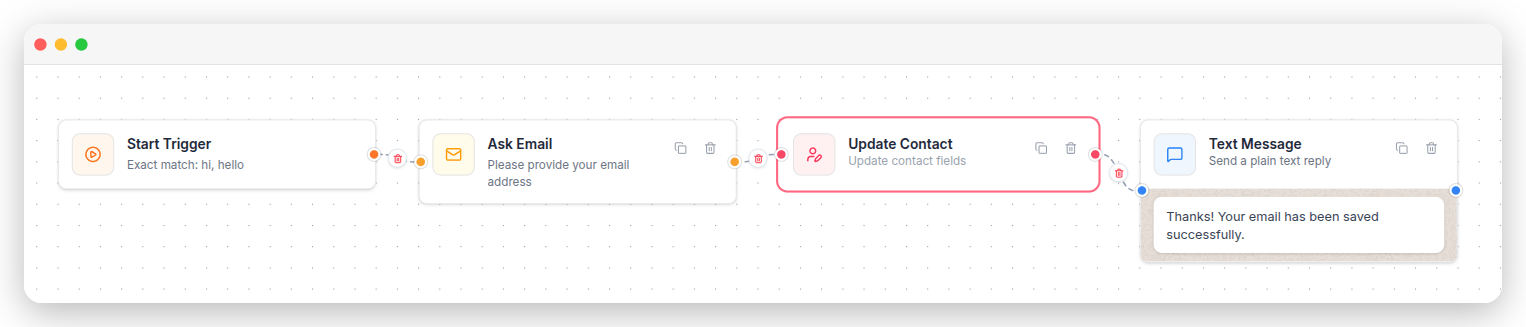
What it does. Saves information to the contact’s main record. You can update their First Name, Last Name, Display Name, Email, Phone, Relation Type, Status and Source. When to use it. Use it after you’ve asked the customer for information, so it’s saved to their record permanently. For example, ask for their name, then save it so every future message can greet them by it. Leave a field blank to keep whatever is already saved. The Relation Type, Status and Source dropdowns each start on No Change for the same reason.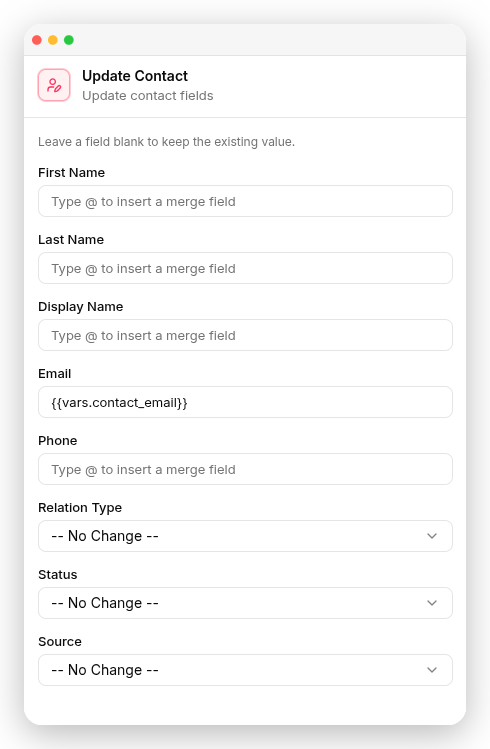
{'{{vars.email}}'}.
Update Custom Field
What it does. Sets one of your own customer fields on the contact. When to use it. Use it to store information that’s specific to your business, such as a membership number, a preferred branch, customer ID, or vehicle number. How to set it up. Choose the Custom Field from the list, then type the Value, using @ to insert a merge field. Required fields- Custom Field and Value are both required.
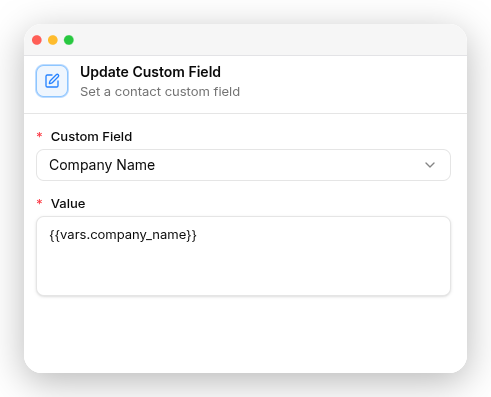
{'{{vars.company_name}}'}.

Assign Label
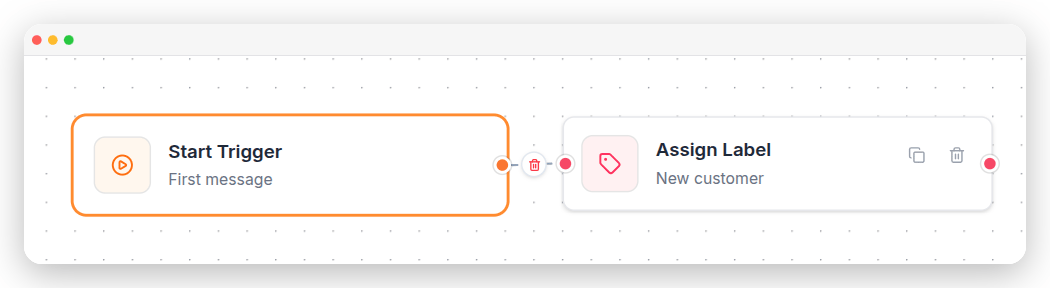
What it does. Adds a customer tag to the contact. If the label you need doesn’t exist yet, you can create it here without leaving the flow. When to use it. Use it to automatically label customers based on their conversation. For example, add theHot Lead label when someone asks about pricing, then send a campaign to everyone with that label.
Required fields
- A Label must be selected.
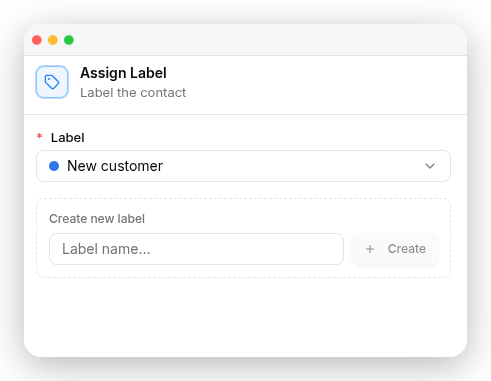
New customer label so you can follow up with everyone who has just found you.
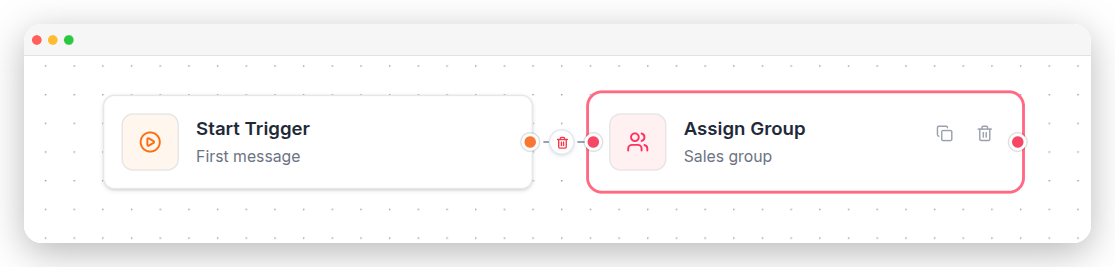
Assign Group
What it does. Adds the contact to a customer group. If the group you need doesn’t exist yet, you can create it here without leaving the flow. When to use it. Use it to build an audience as people come through your chatbot, such as aNewsletter group or a Diwali Offer Interested group.
Required fields
- A Group must be selected.
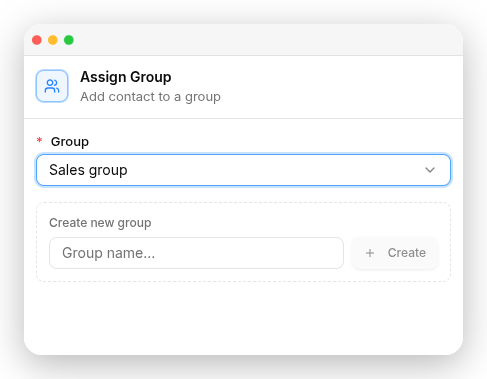
Sales group so the team can pick the conversation up.
Talking to other systems
API Request
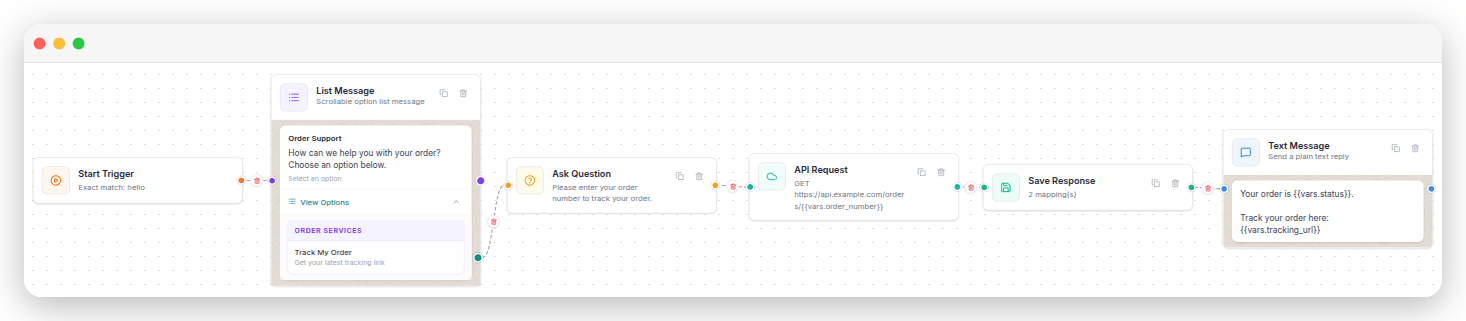
What it does. Gets information from another system, such as your website, CRM, or order system, and makes it available for the rest of the flow. This step doesn’t send a message to the customer. When to use it. Use it when your flow needs information from another system, such as an order status, whether an item is in stock, or a delivery date. How to set it up. Enter the URL you want to call, then choose the Method and the Format (JSON or Form). Add Body Params and headers if the other system needs them. Type @ in any field to insert a merge field — for example, to put the contact’s phone number into the URL. Required fields- URL is the only required field.
- Method, Format, Body Params and headers are all optional. The default settings work for most API requests, so you only need to change them if your API requires it.
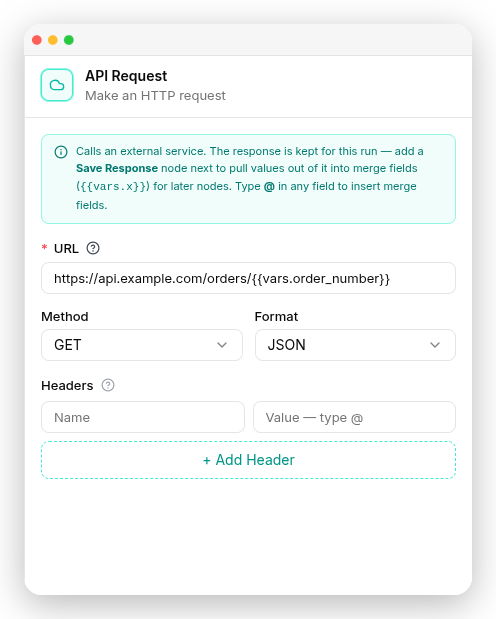
URL: https://api.example.com/orders/{'{{vars.order_number}}'}
Method: GET
Format: JSON
Save Response
What it does. Saves information returned by an API Request, such as an order status, tracking number, or delivery date, so you can use it in later messages or steps. When to use it. Add this step after an API Request to save the information you need. Once saved, you can use it in later messages, conditions, and other flow steps. How to set it up.- In the Source API Request Node box, choose the API Request step you added earlier in the flow.
- Add a mapping. The Source Path points to the piece of information you want, written with a dot between each level — for example
data.status. The Variable Name is the name you’ll use to insert it later. - In any later message, type @ and select the saved variable to insert its value.
- Source API Request Node is required.
- You need at least one mapping, and each one needs both a Source Path and a Variable Name.
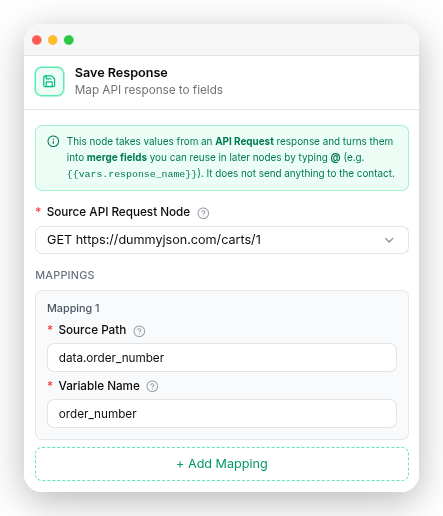
data.tracking_url to the variable tracking_url, then send:
Your order is on its way! Track it here:
Connecting flows
Connect Flow
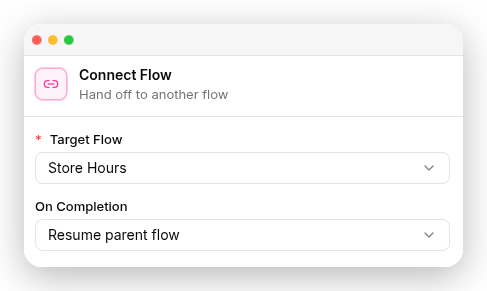
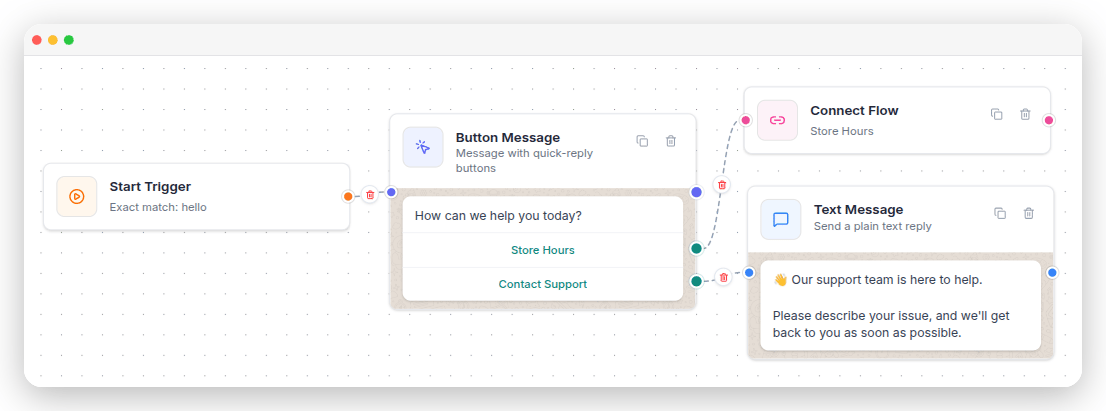
What it does. Continues the conversation in another automation flow. When to use it. Use it when the same set of steps is needed in multiple flows. Build it once, then reuse it wherever you need it. How to set it up. Choose the Target Flow, then set On Completion to decide what happens when that flow finishes. Resume parent flow comes back and carries on from here, and End parent flow stops the conversation there. Required fields- Target Flow is required.
- On Completion has a default, so you only change it if you want the other behaviour.
- The flow must be Active. Drafts and inactive flows don’t appear in the list.
- It must be a different flow, because a flow can’t connect to itself.
- It must be on the same channel type. A WhatsApp flow can only connect to another WhatsApp flow, and a Messenger flow to another Messenger flow.
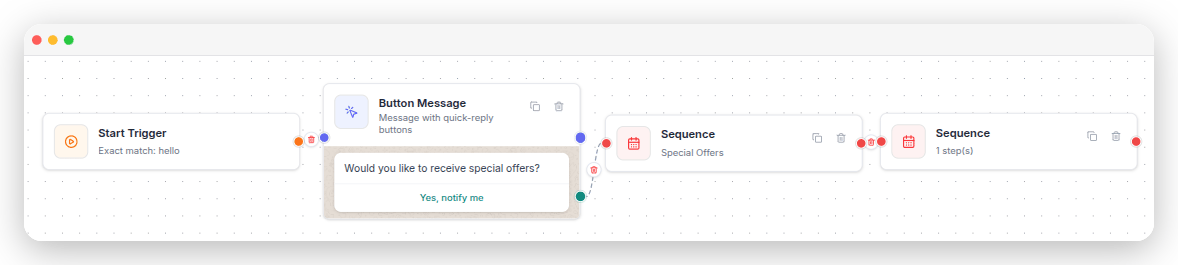
Sequence
What it does. Sends a series of follow-up messages automatically over a period of time. You set the gap before each message in Minutes, Hours, Days or Weeks. When to use it. Use it when you want to follow up more than once over several days, such as a three-message welcome series across a week, or a set of reminders after someone leaves items in their cart. How to set it up. Give the sequence a name, then add each message in turn. For every message, set how long to wait before it’s sent and choose how you want to send it. Required fields- You need at least one message in the sequence.
- Each message needs a Delay of at least 1.
- Each message needs its content — the message text, or a selected template if you’re sending it as one.
- Sequence Name is optional.
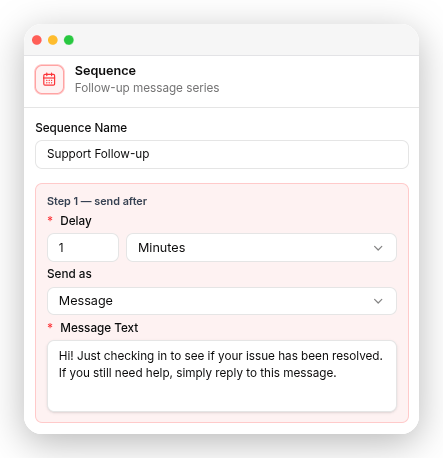
Step 1 — after 1 day: ”🎉 Enjoy 10% off your next order with code SAVE10.” Step 2 — after 3 days: ”🔥 Don’t miss our latest deals! Shop now and save on your favorites.”
A worked example
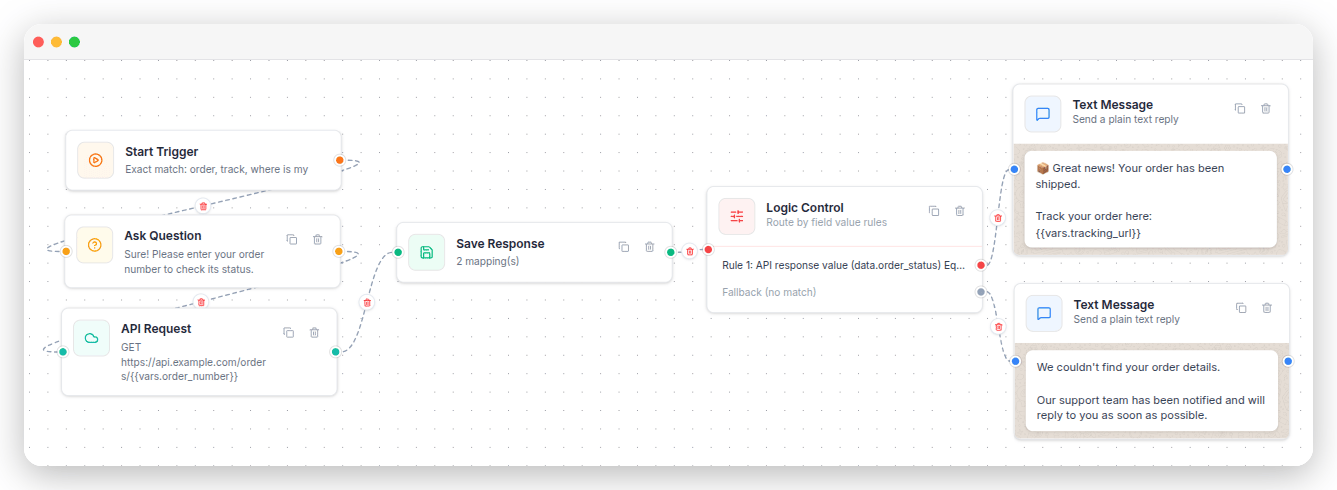
An online shop handles “where is my order?”:- Start Trigger — When message contains
order,track,where is my. - Ask Question (Text) — “Sure! What’s your order number?” →
order_number - API Request — GET your order API with
{'{{vars.order_number}}'}in the URL. - Save Response — map
data.statustoorder_statusanddata.tracking_urltotracking_url. - Logic Control — check
order_status:- Equals
shipped→ Text Message with the tracking link. - Equals
processing→ Text Message saying it ships within 24 hours. - Is empty → Assign Label
Needs human help, then a message saying the team will reply.
- Equals
What’s next
Integrations
Write to Google Sheets or create Google Calendar events.
Merge Fields
Everything you can insert with the @ key.